Monday, March 30, 2015

Black Forest Plus (Plus, Plus)

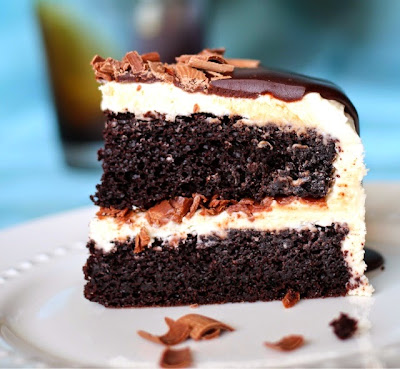
Black Forest Cake
- a moist and tender delight -
Three 'flat' cakes tall.


In this case,
 the whipped cream is a vanilla mascarpone whipped cream, 
the cherries are drunk, 
and the top is covered in a thick layer of Belgian ganache.


Mmmmmmmmm
I've been waiting for chocolate.
I love you, Chocolate, I do!

The cake was (I say was because I think it disappeared already) a very tall cake.
It was really decadent and delicious, though rather messy to cut.
Baking the layers 'flat' really helped with stability. 
As did the bamboo stick with which I impaled the centre of the cake. 
But next time, can't everyone just come to my place? 


I shouldn't have added juice along with the cherries in the centre well in each layer of the filling.
That was probably the main engineering faux pas. 
Specifically in terms of transportation. 
One I'd prefer never to take on again.
I would liken the roads in Calgary to Emmantaler and Gruyère.

But it was totally worth it for a great family birthday get together!

Make three chocolate cake layers. See my previous post on getting flat top results.

Ganache - make first because it needs to cool.

Chocolate, chopped, 350g
Put aside in a bowl you'll add all ingredients to in the end. (heatproof)

Whipping cream, 1 cup
Salt, 1/8 tsp
Corn Syrup, (Actually I always use maple!!! This would be the Canadian difference), 1/6 cup
Put these in a sauce pan, stir together and when it reaches a boil, pour over chocolate.
Whisk until smooth.
Then add,
Butter, 4 tbsp
Vanilla, 1/2 tbsp
and stir until completely smooth. 
It's runny now but thickens as it cools to room temperature or hardens in the fridge.

Mascarpone Filling

Mascarpone, 1 cup, (mine was homemade)
Whip until smooth with the paddle attachment, then add
Icing Sugar, 2 cups
Vanilla, 2 tsp, (it's so nice with those bean flecks!)
beating slowly at first and maybe adding in two parts to prevent sugar snowing all over you kitchen.
when that's all nice and smooth add
Whipping cream, 1 cup
and beat on medium until thickened.

Drunken Cherries
Frozen Cherries, whole bag
Rum, enough to coat the cherries

Assemble as seen in the photo above. 
Use a piping bag to make a mascarpone dam so the cherries stay put in each layer. 
Don't add juice like I did - in fact make sure to squeeze them a bit!

P.S.
You'll likely have left over ganache... It make a fab snack when you scoop it with a spoon 
and then dunk it in freshly ground coffee.


*******


The little star-wheel-Dresden became a pillow.
Far from perfect, but I learnt a lot about sewing. 
I suppose I'll give it a break for a while as things get ultra busy at work,
then attempt a slightly larger undertaking using fabric 
purchased for that particular project.


I struggled with the thickness of the fabric I used for binding, the slipperiness of the orange fabric, (although I rather like the way it pleated itself at all the points of the star) 
and the stretchiness of the dark blue fabric.


I followed the careful instruction of Amy Gibson from 2012's Craftsy Block of the month 
and found that it was possible for me to sew... and maybe even quilt.
Not as easy as she makes it look however.


But I'm sitting here on it right now!


Sunday, March 29, 2015

Cherry Chapstick

A little fruity, minty, muddled creation came about this evening. 

It feels like Spring here in Calgary which is what made me decide I needed to buy mint... 
It's been in salad and sandwiches, so why not add it to some drinks? 


The giant cake you'll see soon didn't quite use up all the cherries 
so they have also been incorporated. No wasting allowed! 
Hence, the Cherry Chapstick. 
As good for the lips as the tongue, tasted slowly by all my taste buds. 

Mint
Cherry juice
Club Soda
Cherries
Sugar
Lemon juice
Ice
Rum

Those were so good we wanted more - but since we were out of cherry juice - 
Overnight Orange was invented.


Peach and mango juice
Club soda
Lemon juice
Sugar
Mint and cherries
Ice
Rum

Drink too many and you will be staying overnight. 
Since we live here, we thought that was just fine.


Saturday, March 21, 2015

For the Sake of Polka Dots


Okay, okay, I know polka dots are for little girls.
But aren't little girls for admiring?
They're cute, right? Just like the dots they might be wearing.
So, along this way of thinking, adults can enjoy looking at polka dots without feeling too silly.
Or so I tell myself.


In case you're interested, my testing is complete. 
Baking a 'flat topped cake' is actually possible. 

Here's how:

1. Tap against the counter a few times before putting in the oven.
2. Make strips of rag, as I've done in the photo below, 
soak them and attach around pan with safety pins. 
It is important not to have them too thick or else your edges will not bake.
3. I found, in my oven, raising the temperature 25 degrees worked perfectly, 
though I still had to bake the cake for almost double the time I regularly would have.


******

Hazelnuß...

Also for coffee addicts, or just people nuts about nuts, who like flavouring in their drinks,
who would prefer something less palm-oily and glucose-fructose-y, than say liquid whitener,
here's an easy and tasty creamer to make yourself.


All you need to purchase is a cup of hazelnuts, 
which you must soak overnight (raw is what I used and let's say for 12-24 hours),
- the rest is likely in your cupboard already -
 vanilla (a bean would be nice) and a tablespoon of liquid honey.


Drain the nuts and blend with 2 cups fresh water in your high powered blender for one minute.
Pour through cheese cloth (a clean dish towel will work fine) and squeeze.
This will give you approximately 2 cups of hazelnut juice, aka hazelnut creamer, 
which you can re-blend with vanilla and honey as you desire.


It should keep for four days in the fridge. If you still have it around by then ;)
Plus you've also got yourself some ground hazelnuts!
(We've tasted them in cake and cookies)


*****

For the Love of Creating

I'll share a few photos simply for the love of making stuff, 
and also because I'd like to show you I don't actually just bake cake all day. 
I even have a real job. Fancy that. LOL.


Every so often I get the urge to sew something. 
This is not to say I have any kind of talent or knowledge in this area. 
Usually I haven't really got much on hand, like with this project, 
so it's really just a recycle of oddments project.

**My mom is a very good sewer of everything, but she seems to have forgotten to teach me.**
(she did however make me some very excellent Hallowe'en costumes)

1. Maybe she'll offer to teach me now that I'm pointing this out!  

2. Even with my very basic skills, 
I've managed to make something as cool as this Dresden type star,
which  I just had to show you. 
What it'll become, I do not know.


However, for the record, I'll just say,
You should certainly have your cake and eat it, too.
Otherwise that would be wasteful. 
And you can always share it! 

Sunday, March 15, 2015

A Wee Cake

Since baking cake is clearly my hobby or, rather my obsession, (or maybe just eating it is?) 
I had to try out an idea I saw on Pinterest (my addiction - does anyone's else have this problem?).


The experiment went terribly wrong.  

My face looked something like this 
- so mad I pulled my hair out - 
you can tell from the lack of whiskers on the cat :


Luckily I was still able to make a mini cake, and provide some slices for a colleague's birthday. 


When I sort out the details following further experimentation, I will share them. 

In the meantime, here is a chocolate (sigh, how I missed you!) creamcheese cake 
with melt-y chocolate ganache and milk chocolate curls.


We liked it! 
A lot.


So, in the end I found the silver lining in the cloud!
My whiskers are even starting to grow back ;)


Wednesday, March 11, 2015

Pink Cherry Chip

Happy Pink Cherry Chip Birthday!

 It's a fun, pretty, girly party cake.

Using the basic white/vanilla recipe, and the addition of some food colouring for pink cake 
and maraschino cherries for a white with red flecks cake, 
I made one of each, creating four alternating layers. 


To be fair, considering the fact that I do not care for maraschino cherries, this turned out nicely. 
I would have liked to use real cherries but 
Calgary often has a shortage of what I need at the moment I decide to want it. 
Like no basil when I need to make pesto.
Or spinach when I need to go Popeye (no tinned, no frozen, no fresh!)

So substitution was a must since delaying the operation was unthinkable.


 Whipped butter icing with cherry pieces, vanilla and almond flavouring separated my layers. 

I used:
Butter, about a cup, soft - whip (6 minutes), 
Icing sugar, 2 cups, 
milk, 1-2 tbsp, 
flavourings, 1 tsp each - whip again (7 minutes), 
then blend in the cherry pieces (I squeezed them out and patted dry before chopping up).

This icing is nice and sticky, keeping the cake very stable, and locking in the moisture.


The outside is decorated in Nanny's Old-Fashioned Frosting
which is similar to, but better than the Seven Minute Frosting I shared with you last year. 
It takes less time since you beat it cool rather than wait, the texture is fluffier and it 
keeps it's shape and springy-ness much longer.
It is basically like melted marshmallows. 
(I tested to see if adding chocolate was okay and it is 100%!)


I was pleased with the tastiness and look of the cake, plus I'm rather happy with my photos,
(apart from the inside shot, which I didn't really get a proper chance to take because it's just rude 
to wish a happy birthday to someone with a piece missing from their cake!!!) 
however, does anyone have any tips on how exactly to slice a cake horizontally and equally?

That would have really taken the cake ;)


I'm not done with cherries, but I'm definitely done with vanilla cake for some time... 
Bring on the CHOCOLATE!!!


Tuesday, March 3, 2015

Looking Glass


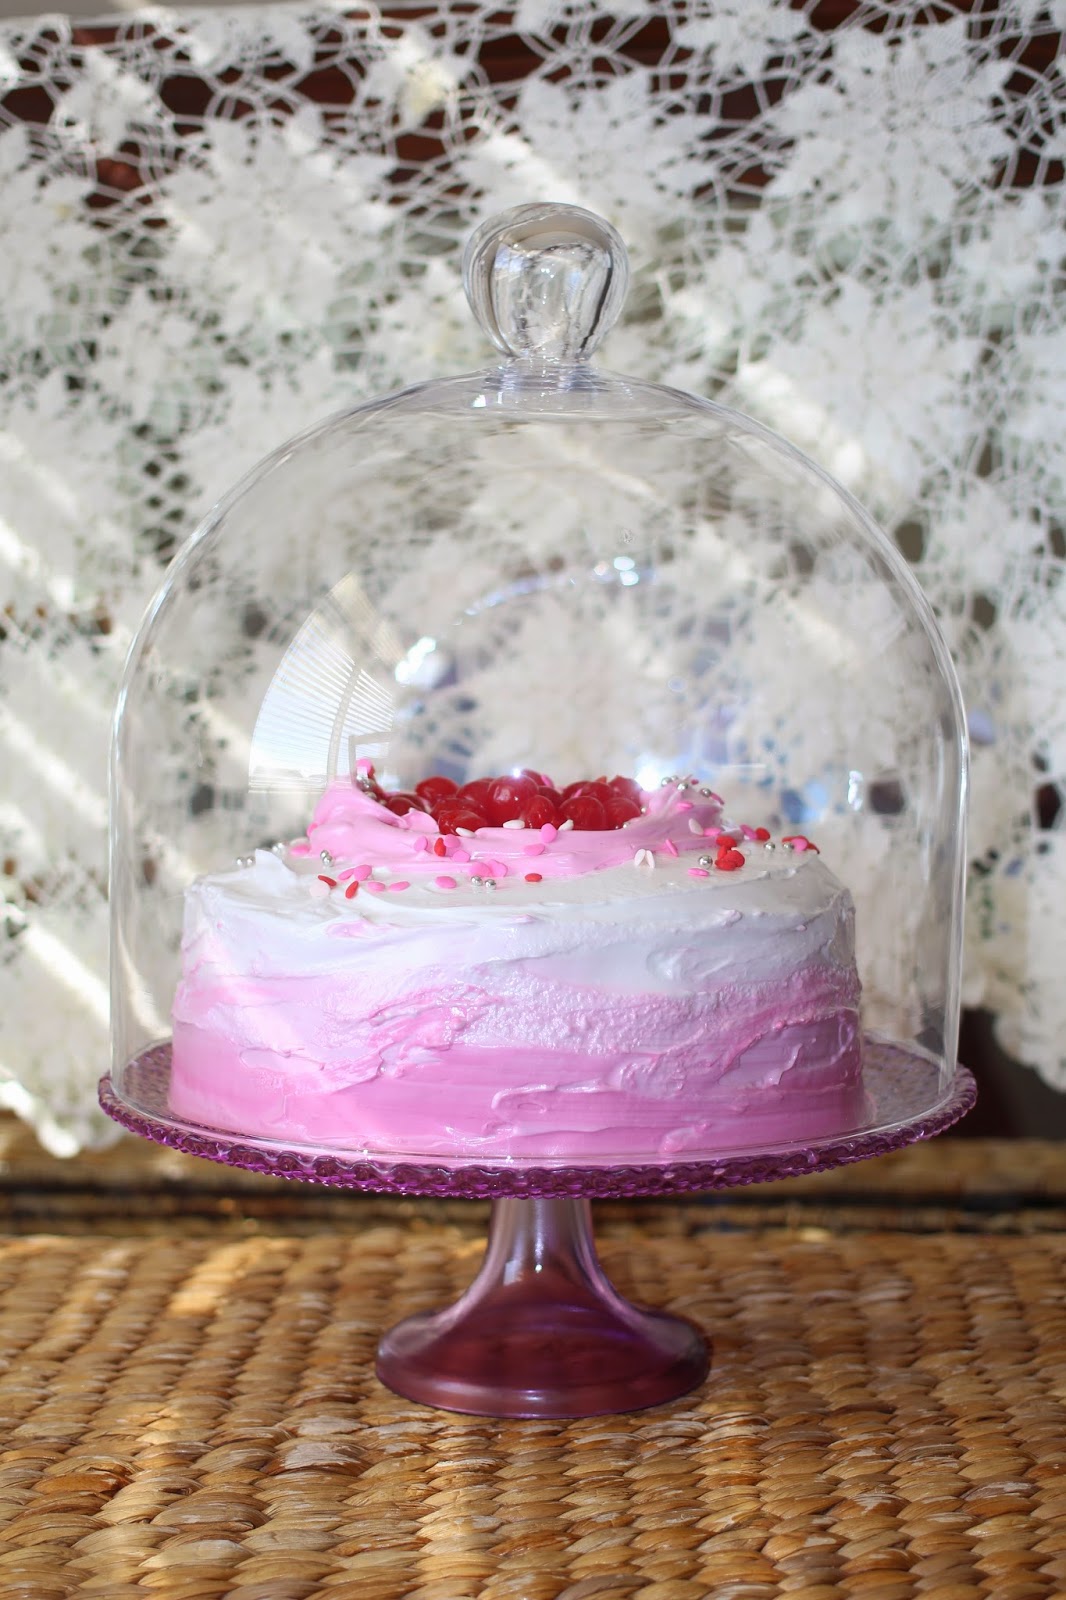
I was eyeing up this pretty glass cover you'll see below, thinking it could be a great way to show off seasonal decor, trinkets, small and tall cakes, and piles of other baked goods perfectly. 
But, I didn't actually need it.

I thought about it for two weeks, deliberated, then found an excuse. 
Teresa's Birthday!


Remember the Valentine's Cake? 
Since then we've sworn off butter (ahhhemmm cake just became healthier!) 
however it's been a chore to find an oil based vanilla cake. 
I tried a few recipes, with modifications, and other ideas, 
and finally here we have a delicious, moist basic cake. 
I'm glad because Teresa should have no less! 

Here it's sort of naked... 
stuffed with whipped cream (from our girls: Dee, Dolly, Daisy and Latte) and berries. 
I should have used stabilizer, and/or perhaps better separating techniques 
for taking cream from milk, but the taste and texture was marvellous.
Albeit quite messy when cutting to serve.


Should you want to give it a whirl here's the recipe, which can be halved:

"That's How Vanilla Cake Should Taste"
(or Cupcakes)

1 1/2 cups Sugar
1 cup Oil
3 tsp Vanilla 
3 Eggs, room temperature

whip the first three ingredients, then whip in one egg at a time

2 3/4 cups Flour, cake flour preferable for tenderness, or sift it
1 1/2 tsp Baking Powder
1/2 Baking Soda
1 tsp Salt

whisk together the dry ingredients and mix in in three additions, alternating with the buttermilk

1 1/2 cups Buttermilk, room temperature 

bake at 325 degrees F, for 35 minute or until set - either in two 8" or two 9" spring-form pans
I'm yet to form a fir opinion on which size I like best... 
allow to cool ten minutes on rack before unclipping and removing from pans
let cool and then ice, or wrap up for future decoration


Soon I hope to share a further modification and hopefully transformation of this basic vanilla cake!